
Lama Abutment Dry Fix is a solution to replace traditional metal flashings for wall flashing. Its highly stretchable coated aluminium composite surface allows for neat sealing between the walls and the roof tiles while the surface provides a high level of durability. Lama Abutment Dry Fix has a self adhesive butyl backing allowing for effective self-fixing on to clean and dry surfaces.
Technical Data
|
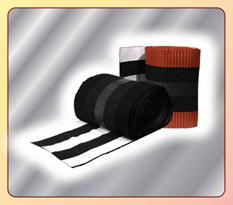
Material
|
Coated aluminium composite with butyl
|
|
Width
|
275 mm
|
|
Length
|
10 m
|
|
Colour
|
Terracotta & Black
|
|
Storage Condition
|
0 – 38oC
|
|
Recommended Specification
|
Lama Abutment Dry Fix is to be installed together with Lama Flashing Strip and installed in accordance to Lama’s recommended installation techniques.
|
Installation for Abutment Dry Fix
|
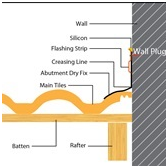
Side Abutment
|
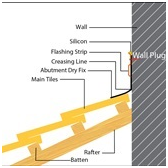
Top Abutment
|
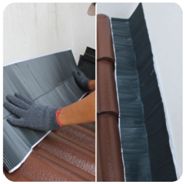 Step 1: Roll out the product at the abutment where the roof tiles adjacent wall.
Note: Ensure the tile surface are clean and dry before laying of Lama’s Abutment Dry Fix.
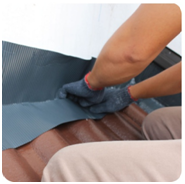
Step 2: Forming Abutment Dry Fix along the creasing ling and align to the adjacent line of side or top abutment.
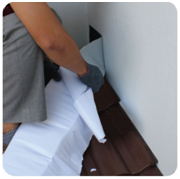
Step 3: Peel off the release paper of Lama’s Abutment Dry Fix and stick to the wall and tile surface.
Note: For side abutment, install the Abutment Dry Fix from bottom to top. Any joining of the Abutment Dry Fix shall have a minimum 50mm overlapping.
Step 4: Mold Lama’s Abutment Dry Fix to the wall and tile profile with roller.
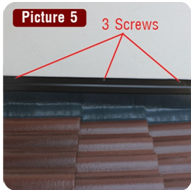
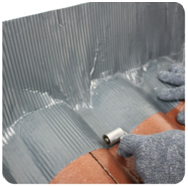
Step 5: Drill 3 holes on the Flashing Strip and mark the holes position on the Abutment Dry Fix align it to the top of the Abutment Dry Fix at the wall for installation of the wall plugs. Drill 3 holes as marked and insert the wall plugs accordingly. Secure the Flashing Strip and Abutment Dry Fix to the wall with screws.
Note: For the adjacent of 2 Flashing Strip, no overlapping required.
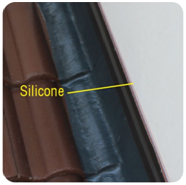
Step 6: Apply silicone along the tapered top opening of the Flashing Strip and the wall.